Prepare computer to develop .NET postprocessors
To be possible to build binary file *.dll of a postprocessor from its source files (Postprocessor.cs, Registers.cs, *.csproj etc.) follow the instructions below.
- Download and install .NET SDK x64 from the official site (https://dotnet.microsoft.com/download, size ~150 Mb). There is a simple step-by-step guide there. Latest .NET 6.0 version required for SprutCAM 16 and 17. For SprutCAM 15 you should use .NET 5.0 version.
- To be able to write source files, download and install the latest available version of Visual Studio Code (https://code.visualstudio.com/download, size ~70 Mb).
- Install C# for Visual Studio Code (powered by OmniSharp) extension from the Visual Studio Code marketplace (https://marketplace.visualstudio.com/items?itemName=ms-dotnettools.csharp)
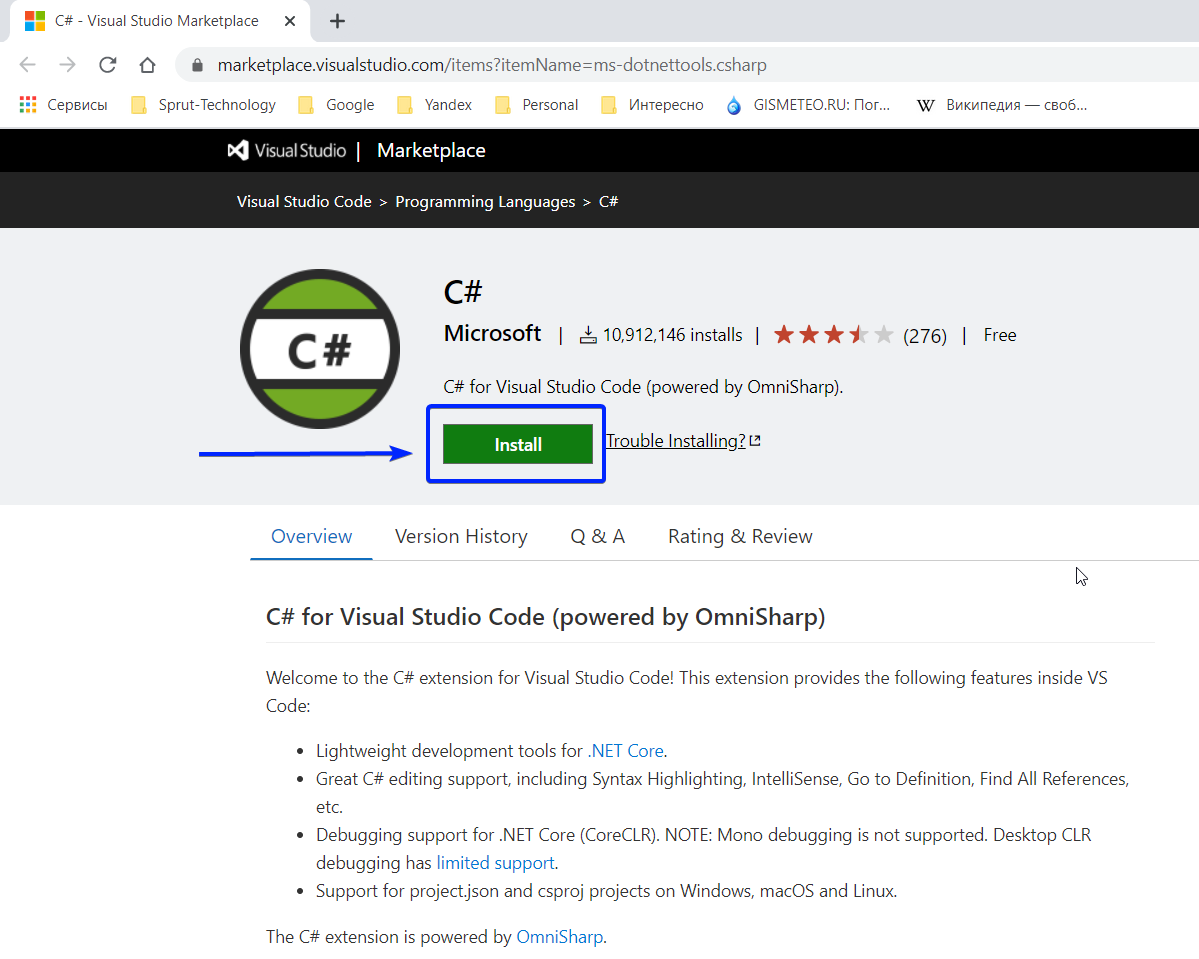
- It will start Visual Studio Code (abbreviated VSCode) instance on the Extensions tab. Just click the “Install” button next to the extension name.
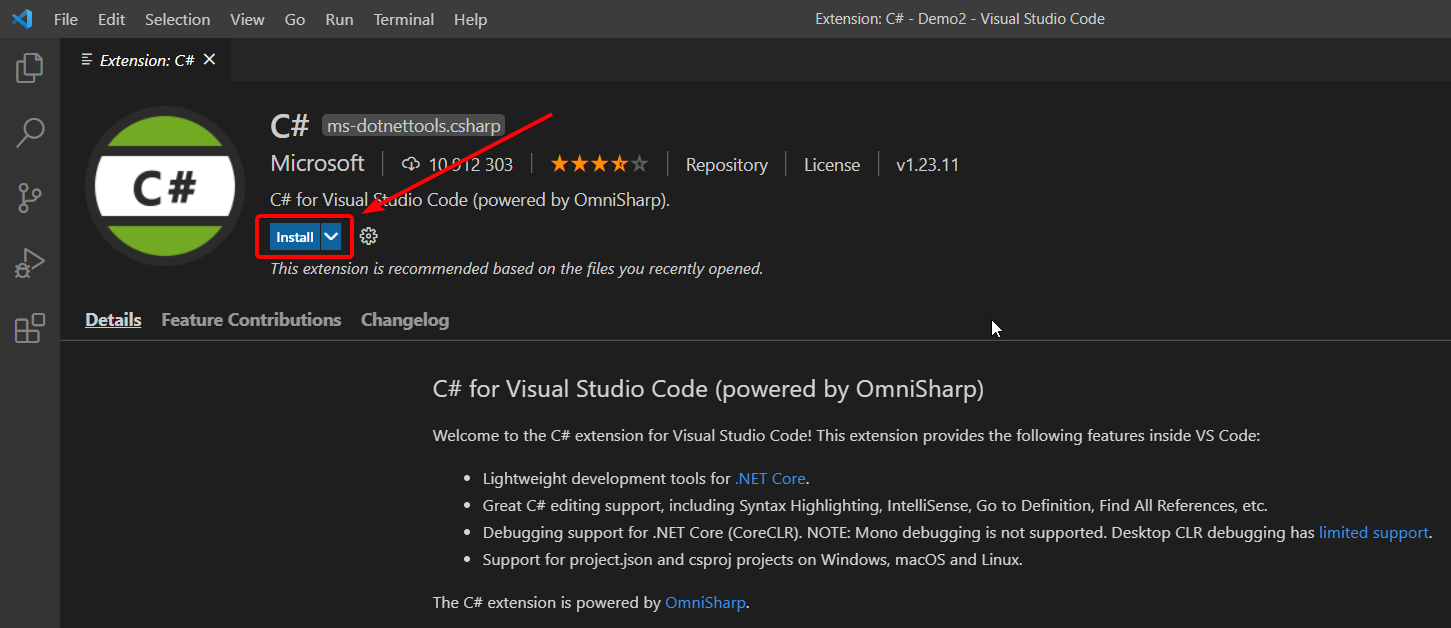
In the latest versions of VS Code, when installing an extension for C#, you are prompted to immediately install the "C# Dev Kit". However, according to the terms, this set requires a Visual Studio license. Using the "C# Dev Kit" extension is not necessary for developing post-processors; everything works fine without it, and does not require purchasing Visual Studio. In order for everything to work correctly, it is recommended to enable the "Use Omnisharp" option instead.

Sometimes latest versions of VSCode require also manually enabling the "Omnisharp: Use Modern Net" setting which you can find after clicking on gear button next to the extension install button. If after completing all items the hints and auto-completion for postprocessors still do not work, try both variants separately - with and without the Use Modern Net option.
- It is recommended (but not required) to install the extension for editing xml files “XML Language Support by Red Hat” (https://marketplace.visualstudio.com/items?itemName=redhat.vscode-xml).
- If you have not yet, download and install the latest SprutCAM X (version 15 or higher required) from the official resource (https://sprutcam.com/download/).
- Start SprutCAM X and launch the CLData viewer from the Utilities menu.
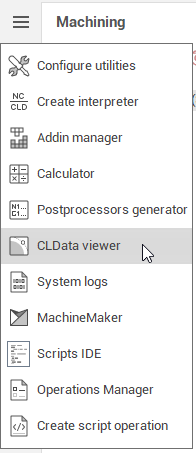
- It will add the “SprutCAMDir” environment variable to the Windows' variables. To be possible to launch Visual Studio Code from SprutCAM the system “Path” environment variable should include VS code installation folder. Usually the VSCode installer adds everything himself and you just need to restart the computer for the environment variables to take effect. We recommend to restart computer after the first launch of the CLData viewer for environment variables to take effect.
- Start SprutCAM and launch the CLData viewer again. Now you can try to create a new postprocessor. Click main menu CLData viewer/Create new postprocessor/Simple postprocessor….
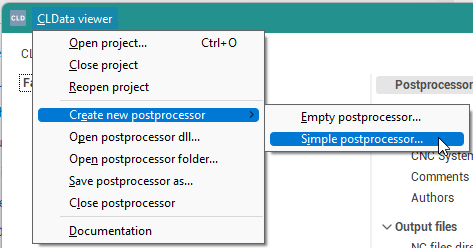
- A standard folder selection dialog box will open. Here you will need to create a new empty folder that will contain all the postprocessor files. The folder name will match the name of the new postprocessor.
- In the context menu of the postprocessor choose “Launch postprocessor project in VS Code” item or just doubleclick on the postprocessor in the list.
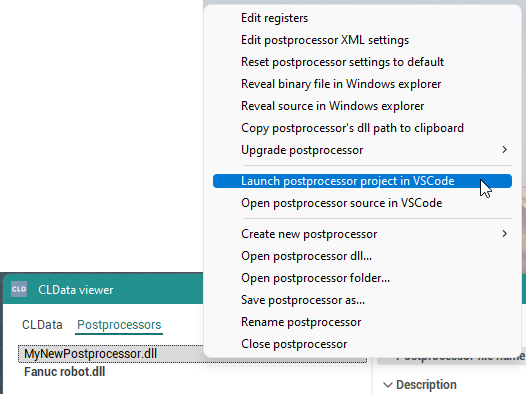
- The new VSCode window will appear with the main Postprocessor.cs source file of the selected postprocessor. The first time you open a post processor, it may take some extra time for the Omni Sharp extension (C#) to download automatically the latest updates and dependencies.
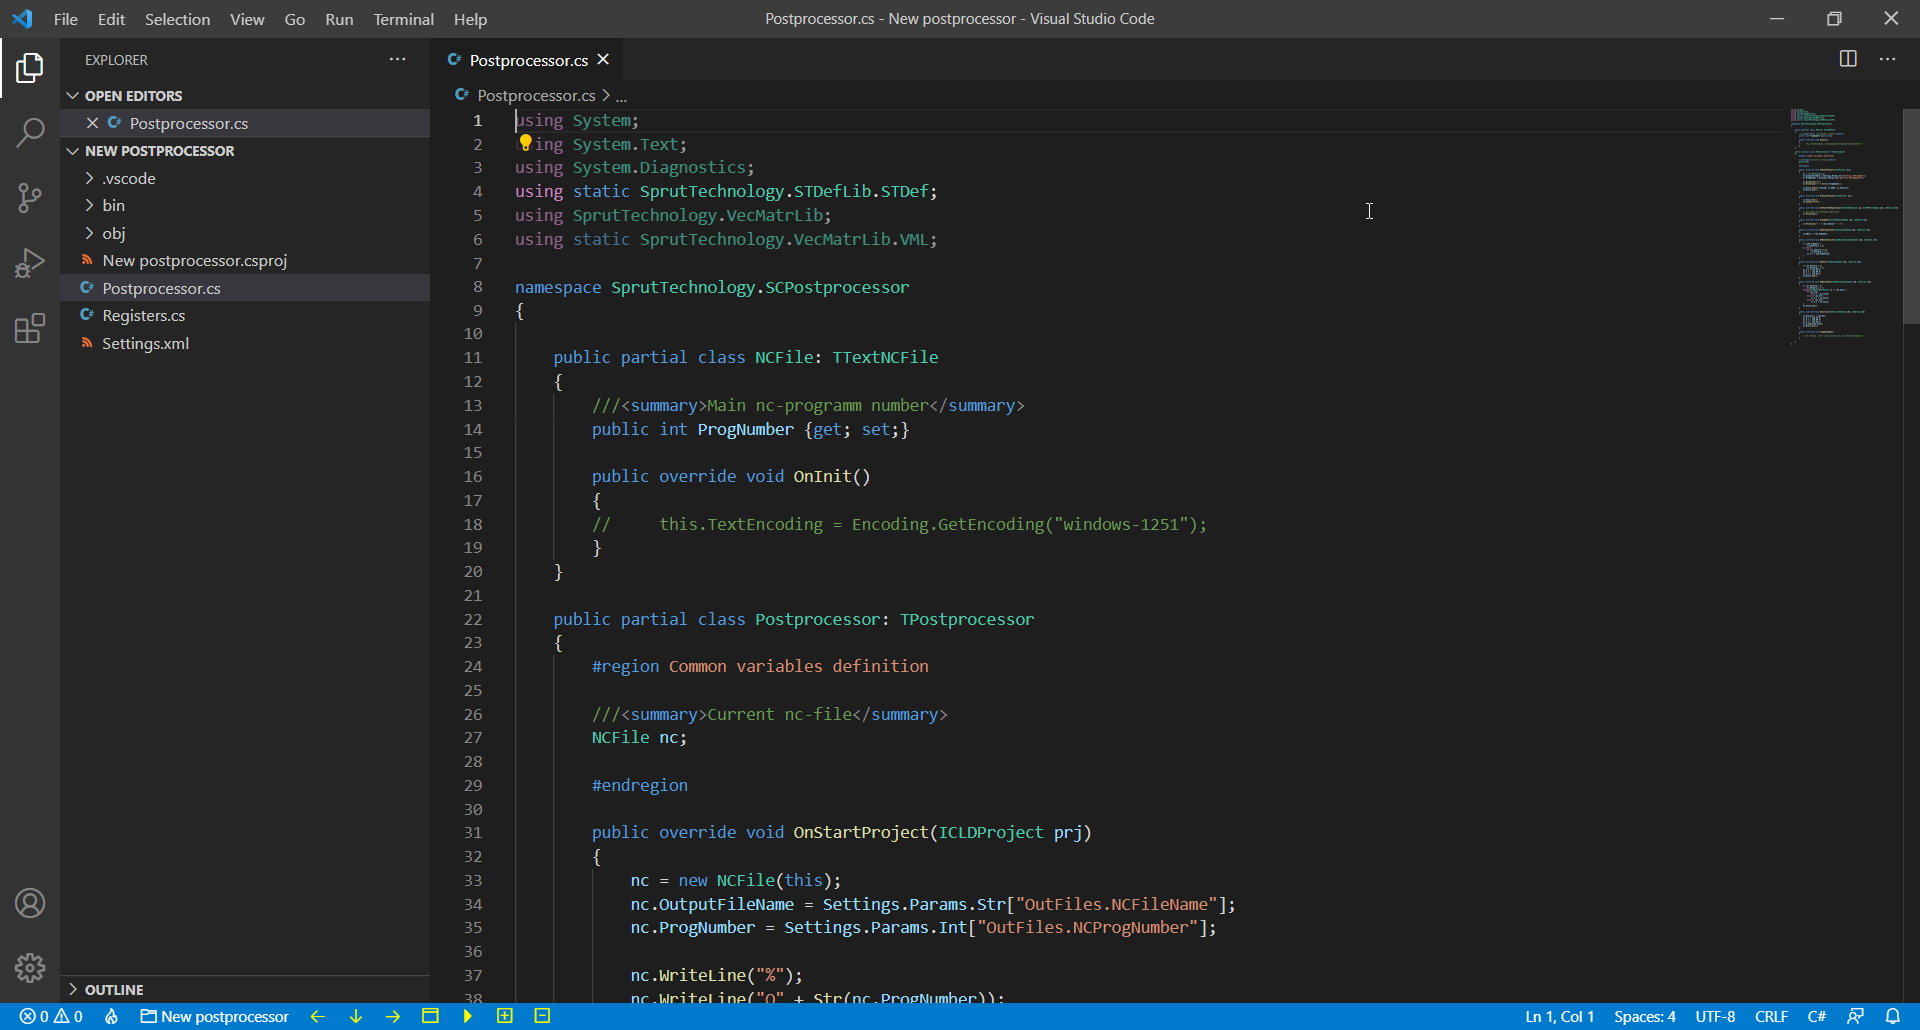
- Then you can set a breakpoint inside the OnStartProject procedure, choose “Run and Debug” tab and click “Launch post” (F5 key).
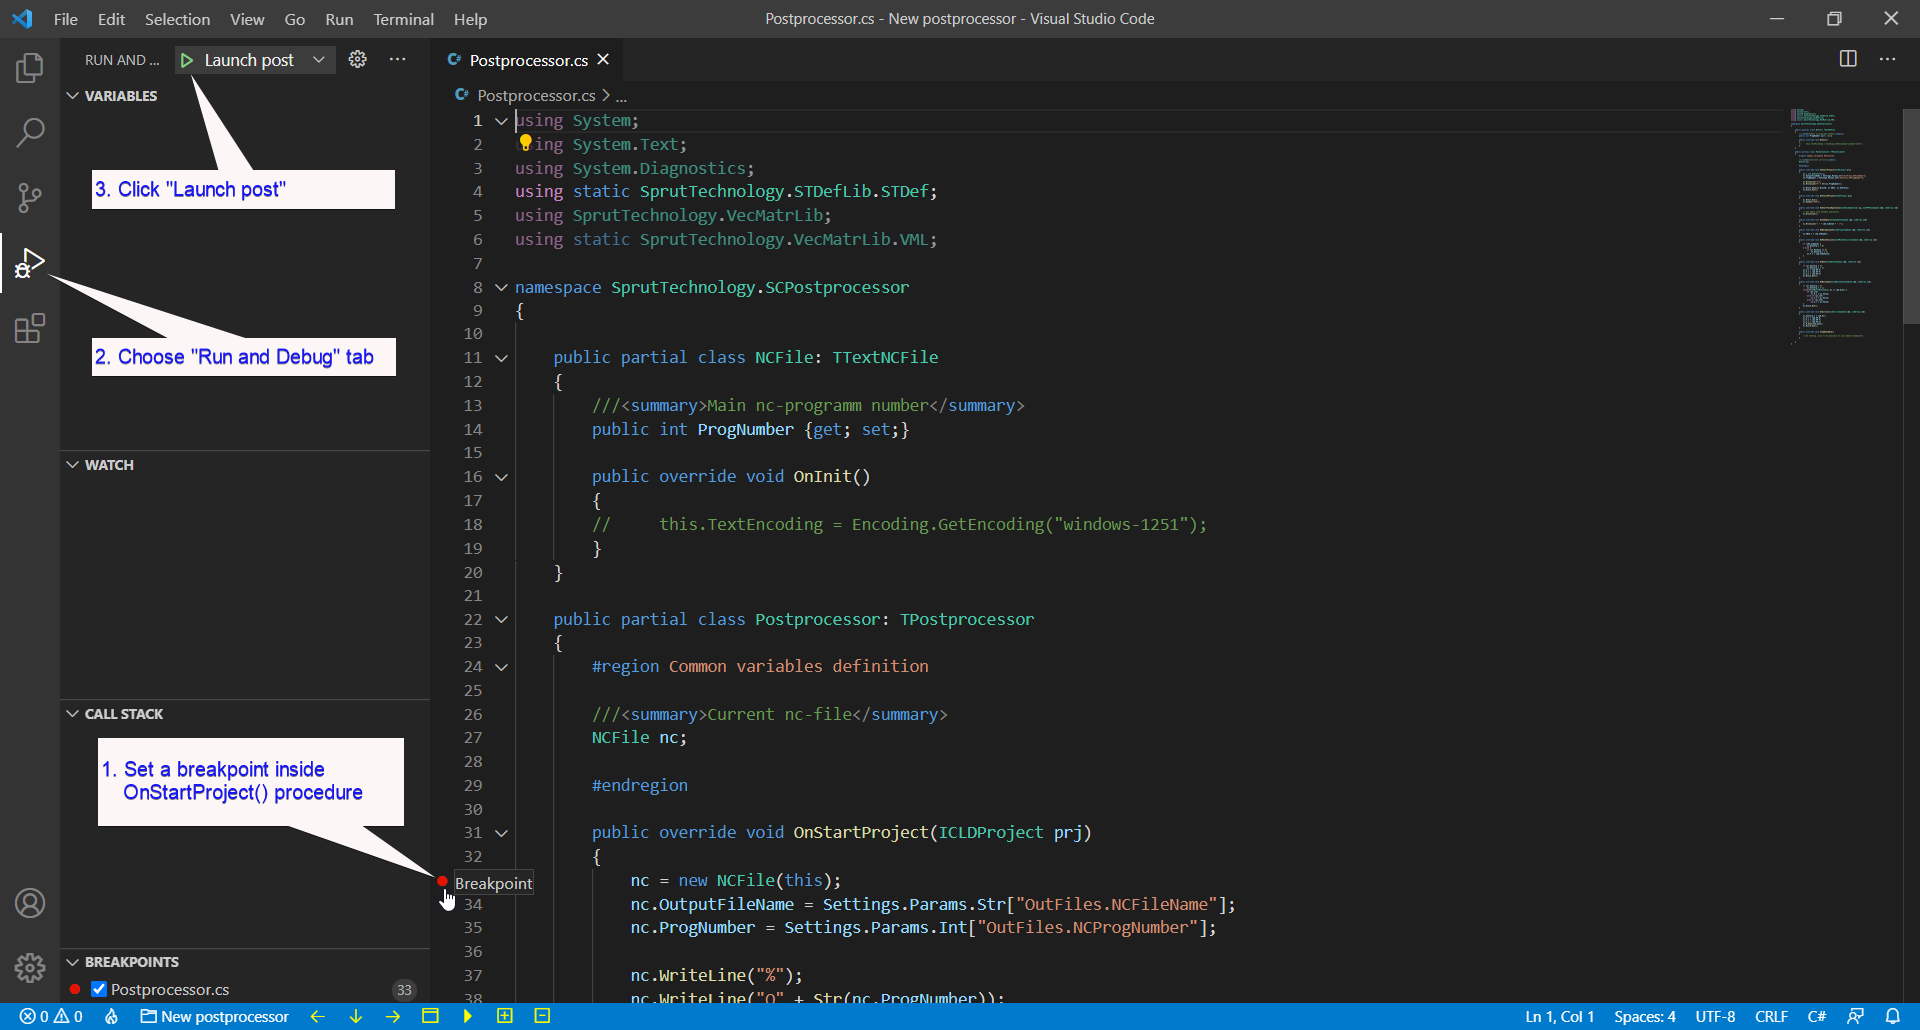
- It will build the postprocessor from sources and start debugging. CLData viewer window should appear (if it will be minimized before). Execution should stop at the defined breakpoint. Now you can use Step Over (F10) at the toolbar in order to walk through the lines of the postprocessor code. As the lines are written to the output file, the CLData viewer will show intermediate results.
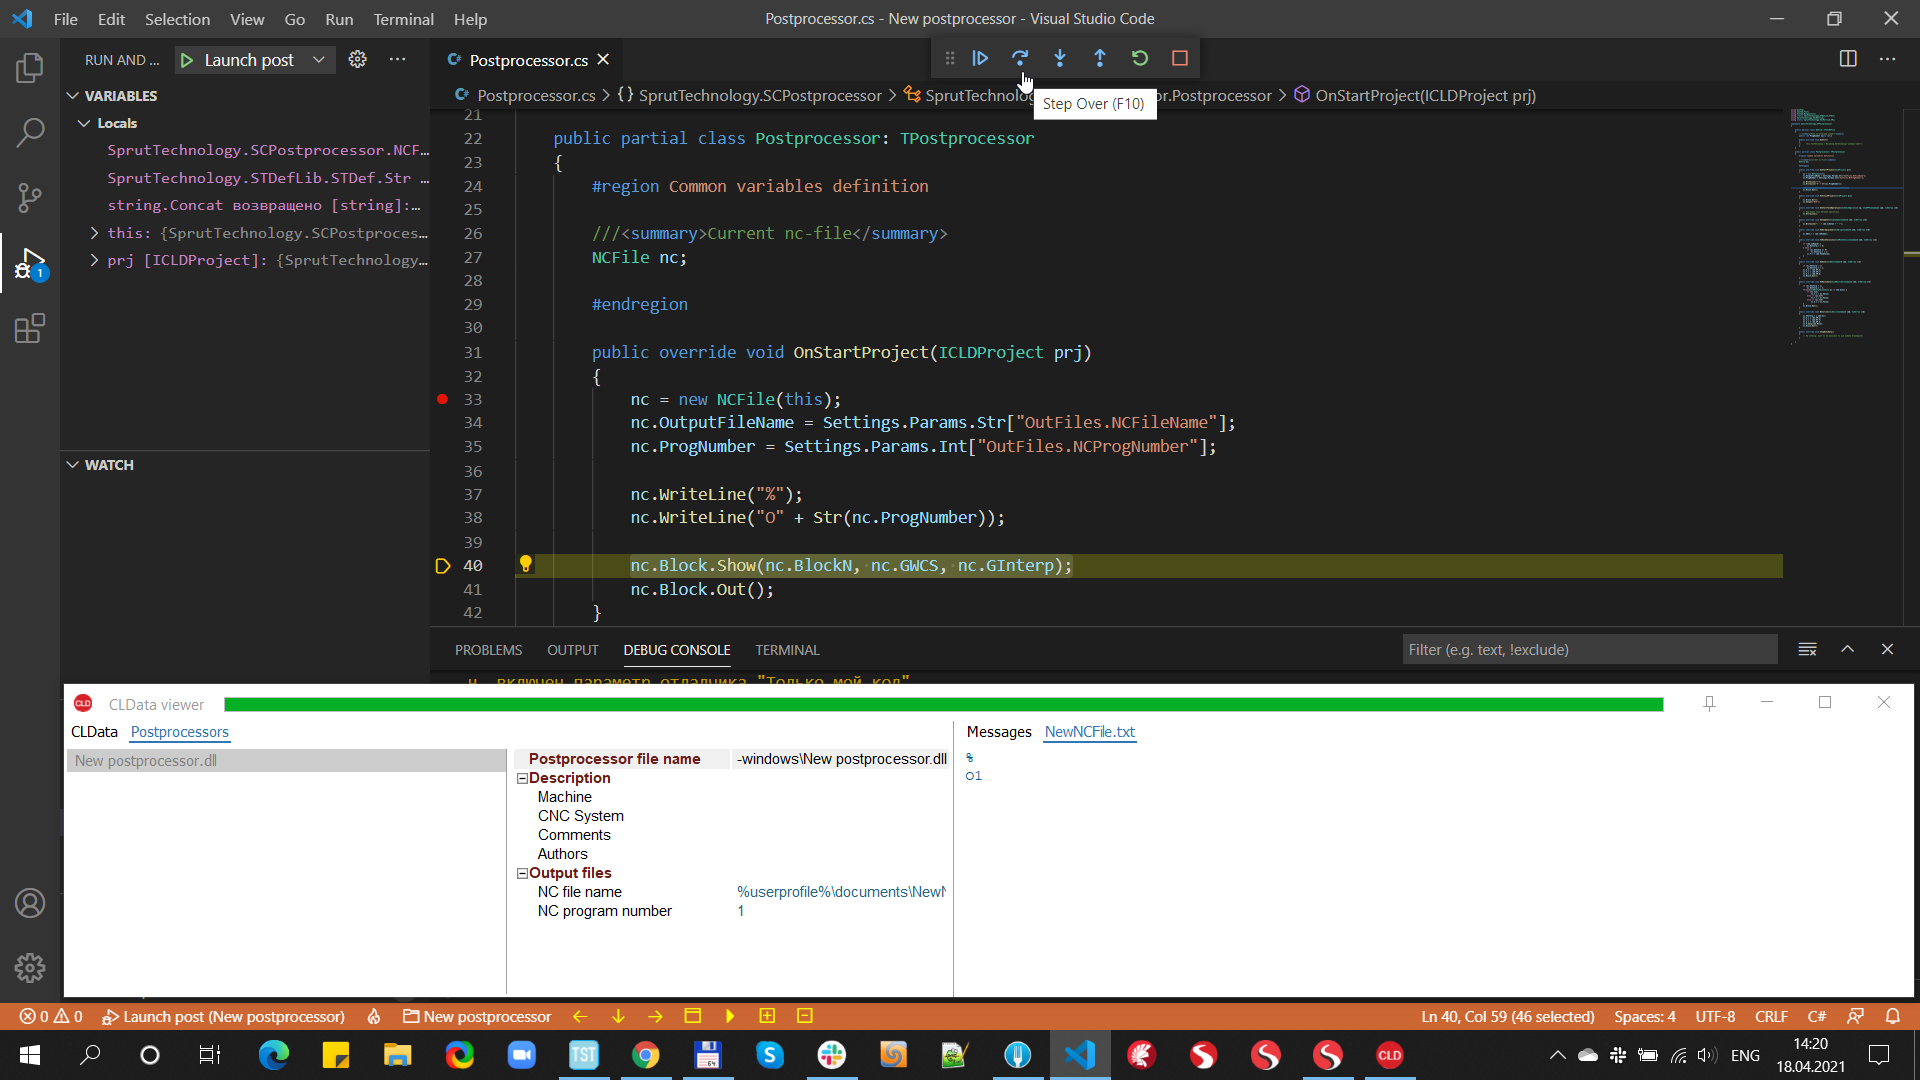
- Finally, you can modify the postprocessor code in the Postprocessor.cs, Registers.cs and Settings.xml files as you need and debug it using all available features of the Visual Studio Code. If you are not yet familiar with the capabilities of VSCode, we recommend that you visit the "Get started" section from its official documentation (https://code.visualstudio.com/docs/getstarted/introvideos).
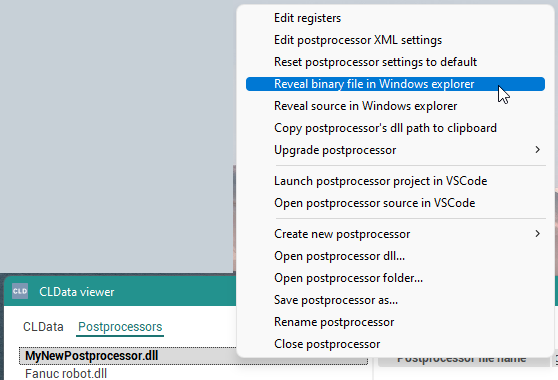
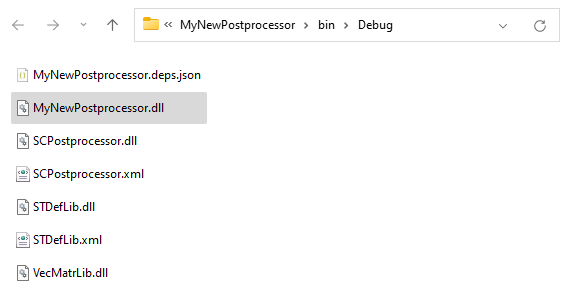
- After you have written and debugged the postprocessor source code, you can obtain and use the postprocessor binary output *.dll file. Just select "Reveal binary file in Windows explorer" from the context menu of the postprocessor in the CLData Viewer. This will select the postprocessor binary in explorer from where you can copy or send it to the customer.
