Smart snap
The Smart snap  button enables / disables snapping to objects in the graphics window. This is useful when creating new or editing existing geometric objects, such as points, lines, contours, coordinate systems, etc.
For example, using smart snap feature you can easily create exact well constrained drawings on the fly.
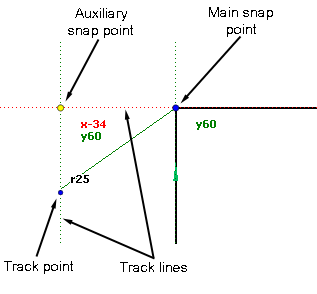
The main building blocks of the smart snap are:
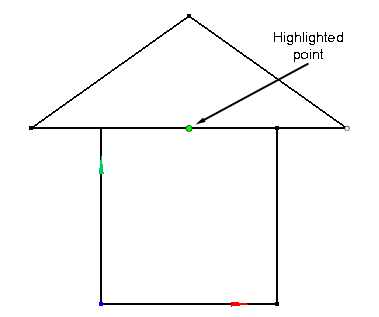
Highlighted points. When you move the cursor over geometry entities the points you can snap to are highlighted with the lime color. These are the terminate points of cuts and arcs, the distinct points, the center points of arcs and circles, the middle points of cuts, the intersection points etc.
Main snap point. When ever you click with the left or middle mouse button on a highlighted point or on a track point (see below) you create the main snap point with associated set of track lines. The main snap point is persistent. It means the point doesn’t disappear when you move the cursor away from it. The main snap point is labeled with the point coordinates.
Main track lines. These are the lines originated from the main snap point. Some of the lines are aligned with the current Local coordinate system, the others are aligned with the neighboring geometry entities (e.g. if the main snap point is the terminate point of a cut, the main track lines include the lines parallel to and perpendicular to the direction of the cut).
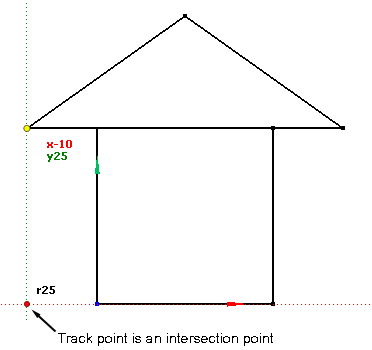
Current track point. The track point is the point on a track line. When you move the cursor over a track line the track point is moved too. The track point is labeled with the distance from the current snap point. The track point may also be an intersection point of a geometry entity or another track line with the current track line. The point is colored red in that case.
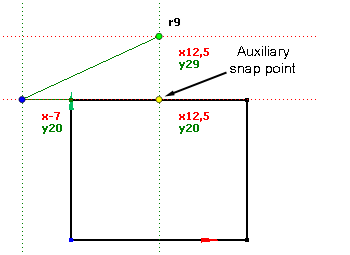
Auxiliary snap point. When you hold the cursor over a highlighted point or a track point for some time the point is turned into the auxiliary snap point. The auxiliary snap point is the same as the main snap point except it is not persistent. It means the point disappears when you move the cursor away from it and its track lines. The auxiliary snap point has its own set of track lines. So you can construct intersection points between main an auxiliary track lines on the fly. Actually this is very useful feature.
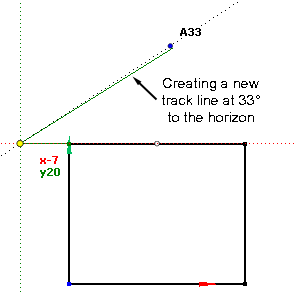
Dragging of the track lines with the middle mouse button. You can press the middle mouse button over a track line and holding the button drag the track line. This action will create the new track line placed at some angle relative to the source track line. When you drag the line you can see the actual angle value on the screen.
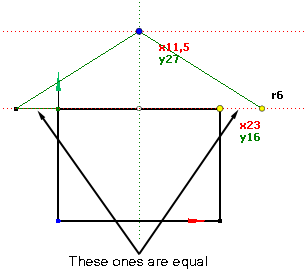
Keeping in mind last track distances. When you make a drawing you may want to make some cuts of equal length or something like that. To resolve this task the smart snap remembers last three track distances you have accepted when created the drawing. So when you move the cursor over the track line sometimes the track point is colored yellow. It means the distance from the track point to the snap point is the same as one of the last three distances.
See also: