Creating new operation
To open the window for creation a new machining operation just press the ![]() button.
button.
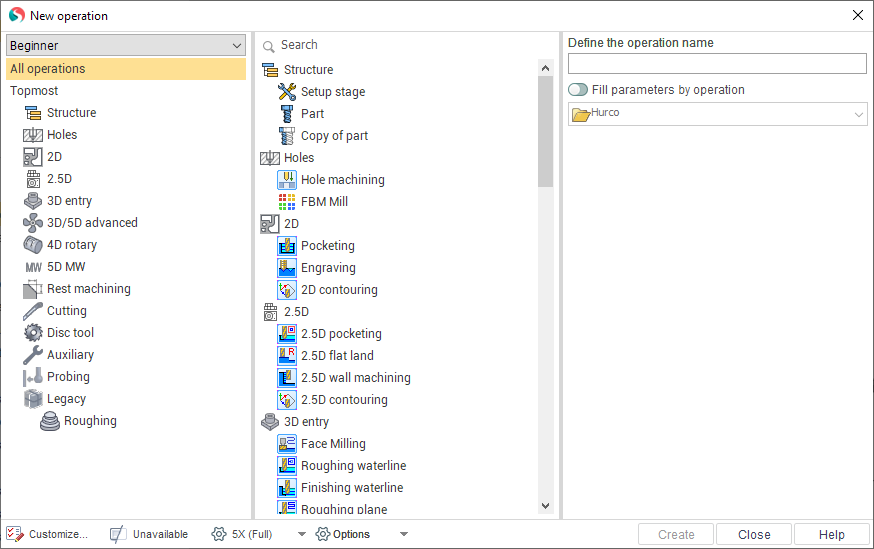
The window is divided into three parts. Left one is the list of operation groups. Here you can select one of the groups, and in the middle part of the window would be displayed a list of operations that belong to selected group. You can also select "All operations". Then all the available operations will be shown in the list of operations. For a quick search of desired operation you can also use the search field, that is located above the list of operations. When you enter characters in the list of operations remain visible only the ones that include the specified sequence of characters. In order to create an operation select it in the list and click on the "Create" button, the operation will be created and the window will be closed.
By double click of the left mouse button on the operation in the technical process, an operation of the appropriate type is adding. Thus creation operation window remains open.
There is also one more quick and easy way to create a new operation. To create an operation, you can click the arrow next to  and choose from the menu the desired type of operation.
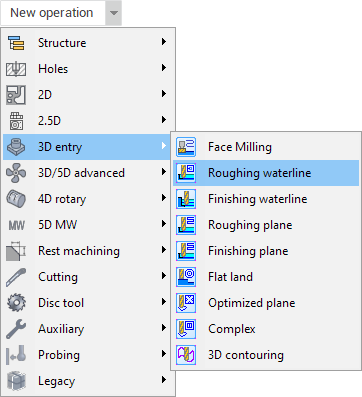
This method of creating operations significantly accelerates the work, as it eliminates the need to constantly open and close the windows.
In the right pane of the new operation window displays information about the selected operation. Here you can specify the name of the newly created operation ("Define the operation name" field), and copy settings from another operation. It is enough to enable <Fill parameters by operation> check-box and select desired operation from the combo box. At the bottom of the information panel, there is a picture that explains the meaning of the operation. You can start or stop playback of video clip by clicking on the picture.
Depending on the presence or absence of the licence options, and depending on the machine, some operations may not be visible in the list. In order to become visible you can click the "Unavailable" button. In this case they will be gray in the list. When you select such operation, the reasons for which this operation is not available will appear in the Information panel.
By default, operations can be divided into groups such as "Roughing", "Finishing", "Rest machining", "Lathe", "5X", etc.
"Roughing" operations provide a selection of the entire workpiece material, which lies outside the machined model and outside prohibited zones. Generally roughing operations are used in the initial selecting of material in that cases where the shape and dimensions of the workpiece are significantly different from the shape and dimensions of the workpiece.
"Finishing" operations perform machining only of the final surfaces, without workpiece material removal. The finishing operations are normally used for the final clearance of a models surface(s) after previous machining (e.g. roughing). They can also be used if the workpiece and final model do not differ too much or if used workpiece is made of soft material.
"Rest machining" operations allow to perform machining only on those areas where material was left after previous machining operations. The rest machining strategies are identical to other strategies, only different values are set. The roughing remachining operations perform removal of the entire volume of residual material, and the finishing ones, machine the actual surface of the model only in un-machined areas. The rest milling operations allows to optimize machining for complex details. They are designed to be used for roughing or finish rest milling using a tool of a different shape or smaller diameter than the tool used in previous operations.
Other groups are created. They are based on the same machining type of operations included into group or depending on other common parameters such as developer or licence.
However, the breakdown of operations on a groups is a rather nominal. You can always redistribute operations between groups, create new groups, hide unnecessary operations and groups. To do this, enter the edit mode by pressing the "Customize..." button.
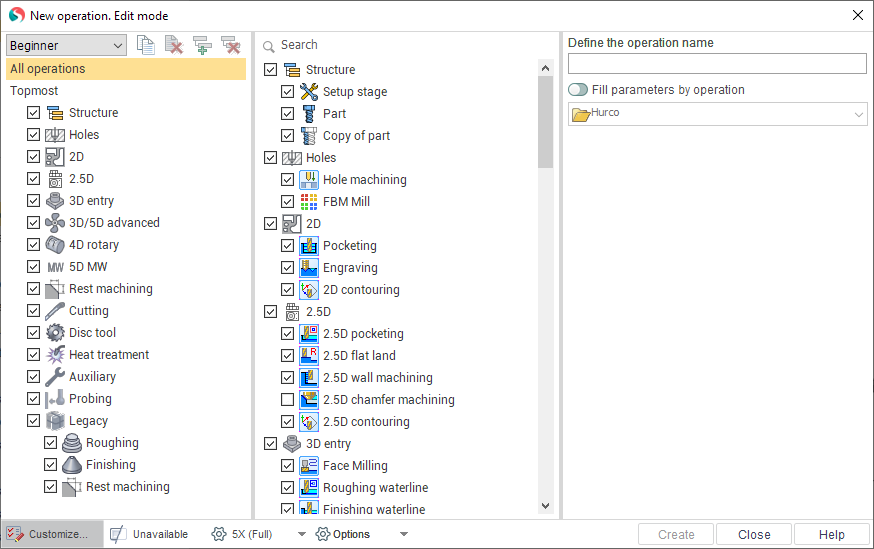
The window will change, there will be new buttons and check-boxes next to the names of operations and the groups. Also it will be available to drag and drop operations between groups. The check-boxes determine the visibility of operations and groups. To create a new or delete an existing group you have to press the appropriate button in the upper part of the window. Then you can click on the group name and change it to any other. You can also drag the group to a different location or even inside another group.
Creation of a new operation with your own settings is also possible. To do this, create an instance of operations, based on which you want to create a new operation, close this window, change the settings of the operation as you need and then select in the pop-up menu of the Technology page "Save as user operation ...". This will bring up a dialog box where you can specify the file name, in which the operation will be written, and press Ok. You can then re-open the window for creating operations and move added operation to the desired group.
The visibility of operations and a breakdown of them into groups in conjunction with the user operations allows fine-tune the system for your own purposes. Moreover, you can create several layouts for different purposes. Here they are called configurations of operations. For example, working with one machine requires one set of operations, the second machine - the other. The current configuration is selected in the drop-down list at the top left corner of the window. In the edit mode, you can create multiple configurations. For this purpose, next to the list, there are add and remove buttons.
![]() removes current configuration. Last configuration in the list can not be removed.
removes current configuration. Last configuration in the list can not be removed.
![]() adds the new configuration, all properties are copied from the current configuration.
adds the new configuration, all properties are copied from the current configuration.

Drop-down menu on the button to create a configuration allows you to restore all of the groups and the visibility of operations in its original form as laid down in the system default.
See also:
Common principles of technology creation